Woocommerce integration setup guide
Learn how to add the seedtrace plugin to your Woocommerce store

Katharina
Last Update 3 年前
With a huge market share of Wordpress and consecutively it's e-commerce plugin Woocommerce, its highly likely that most of us visited a Wordpress page already or even shopped at a Woocommerce store. Our integration makes it easy for shop owners to integrate their transparency and supply chain data into their product detail pages. This article will show you how.
Installation
The seedtrace plugin can be found in the Wordpress plugin directory and installed directly from your WP admin. You must have Woocommerce installed and set up in order to use the seedtrace plugin. To install follow these steps:
1. In the sidebar select Plugins > Add new
2. On the plugins page enter "seedtrace" into the search field
3. In the search results select "seedtrace" and click "Install now"
4. After successful installation click "Activate"
You can now find the seedtrace plugin settings in your sidebar under "Woocommerce" > "seedtrace"
Setup
To get started you will need to complete a few simple steps to connect data from seedtrace with your Woocommerce shop:
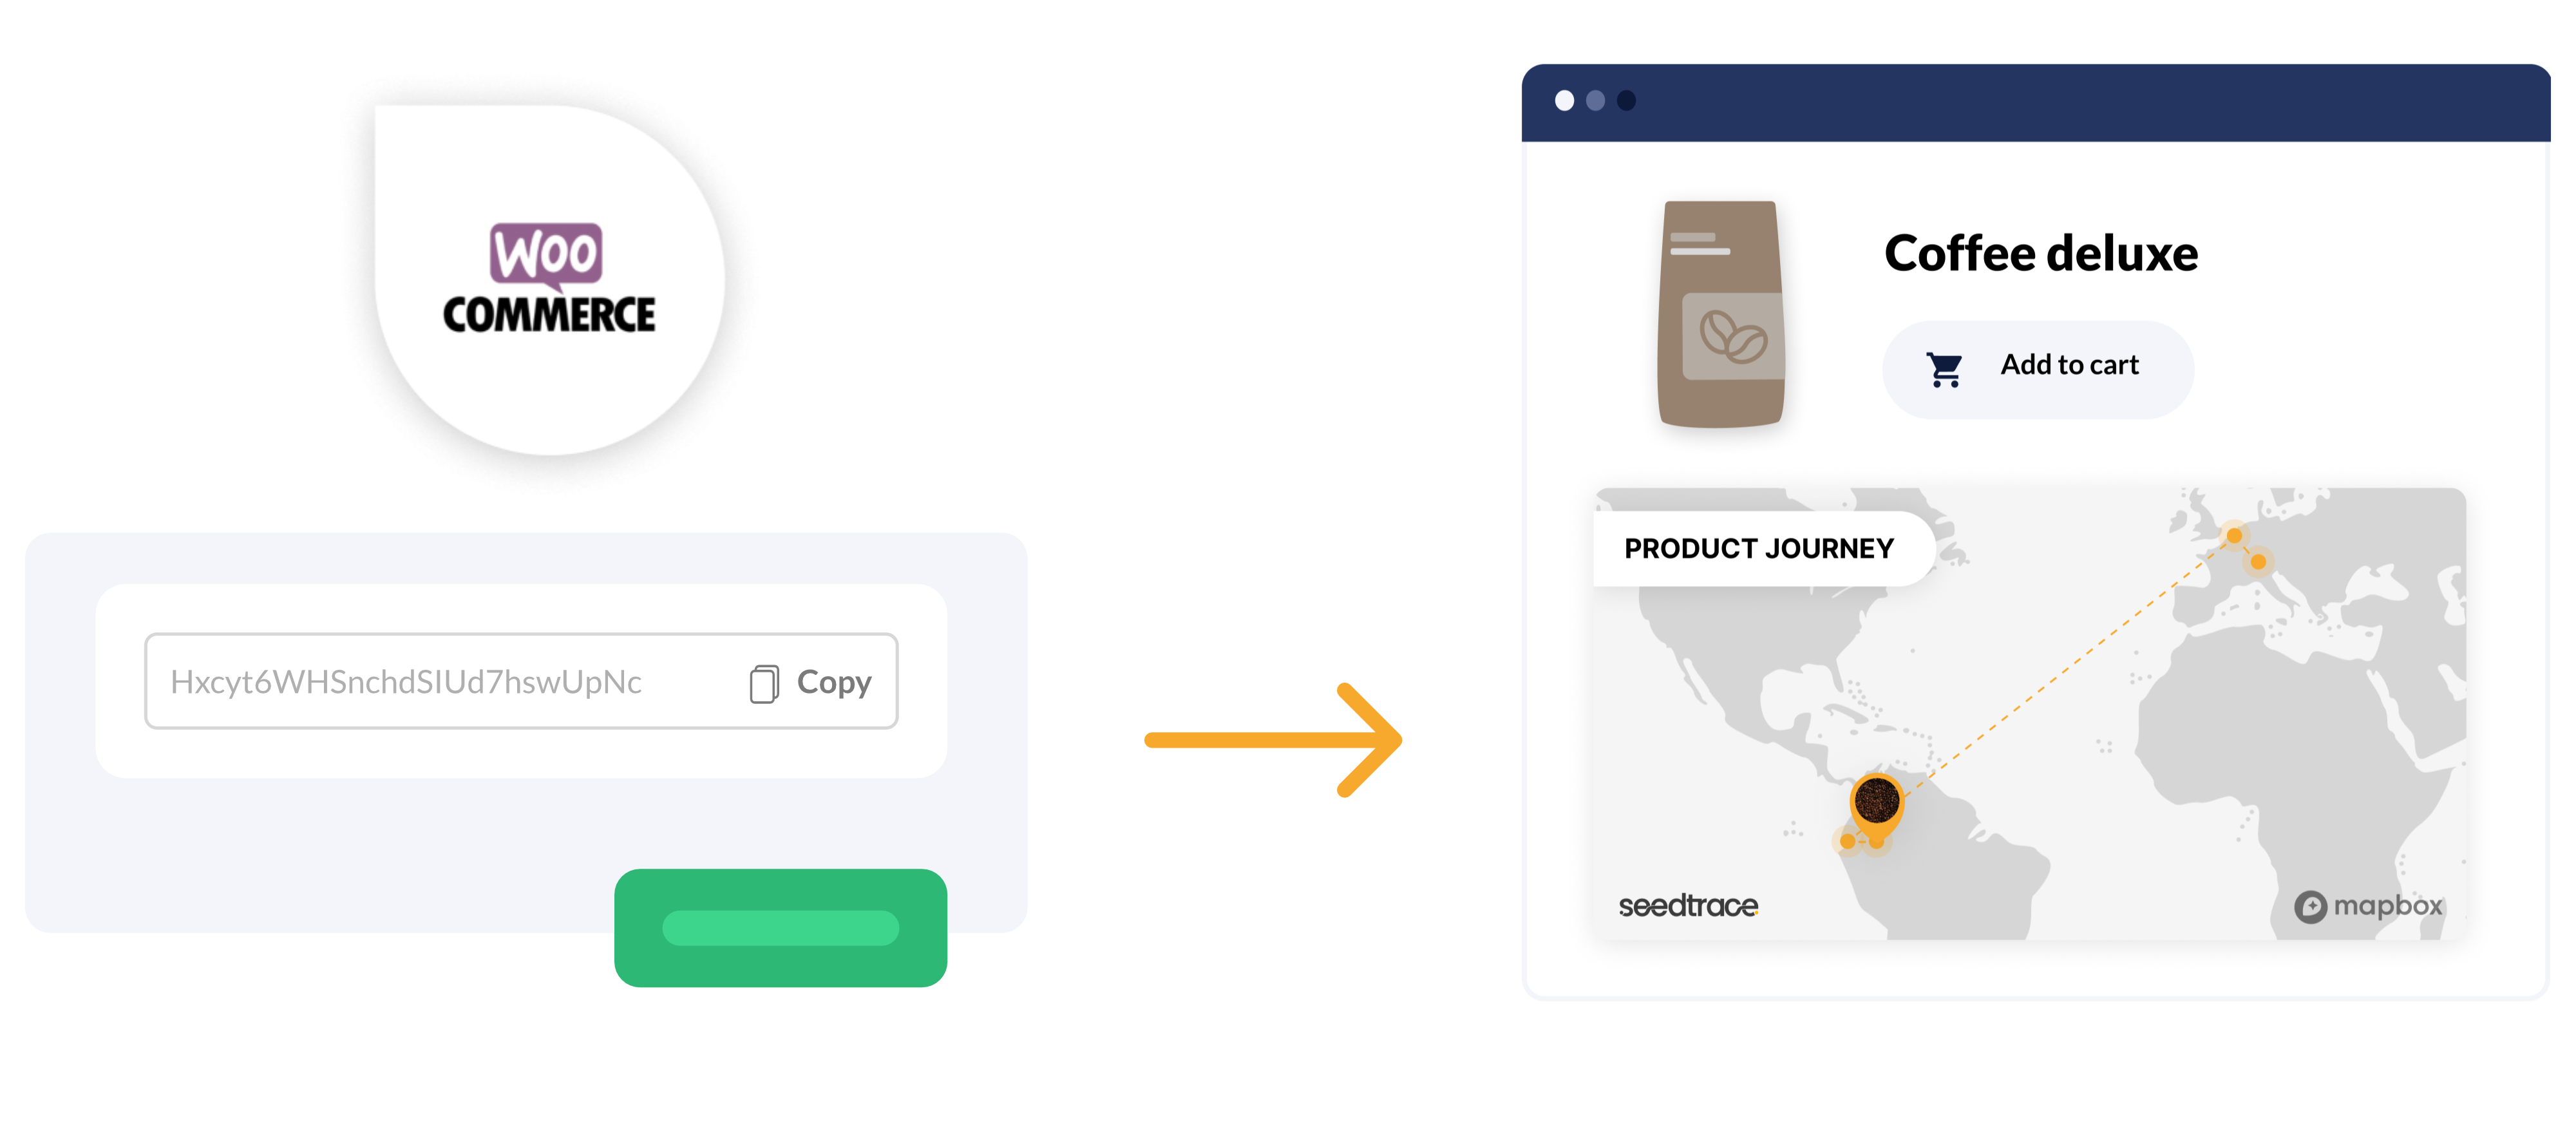
1. Add your API key
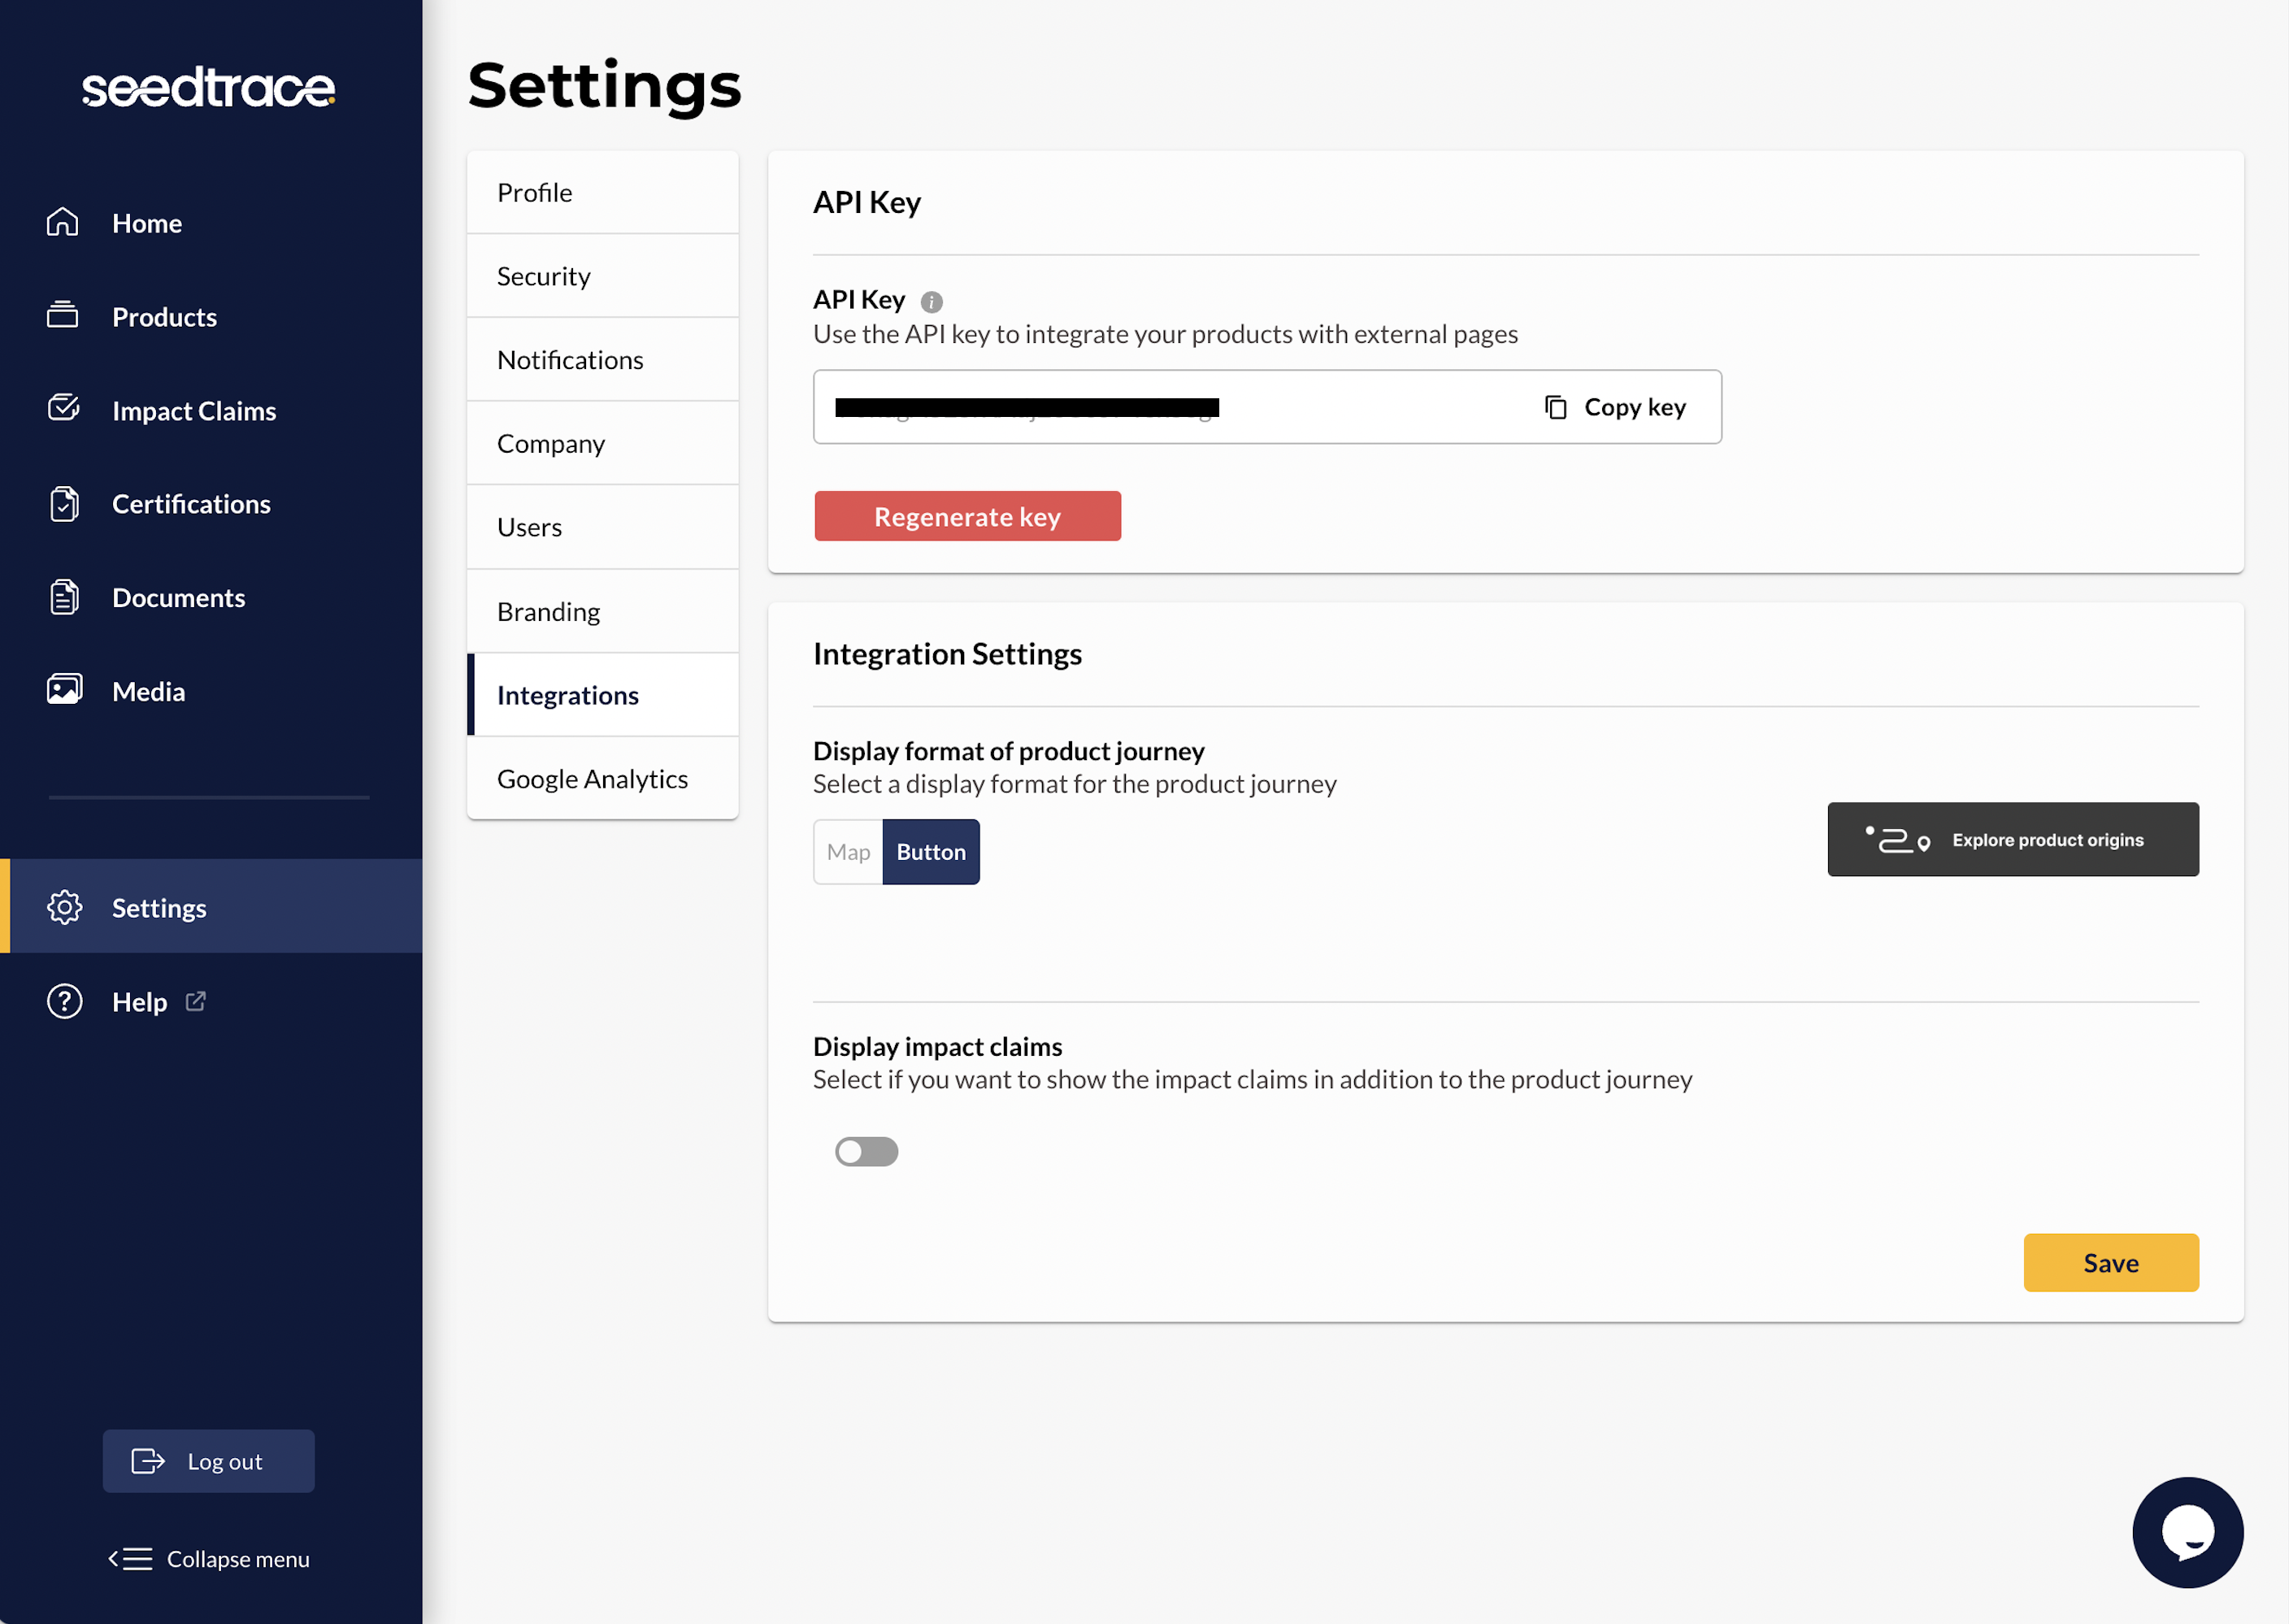
You can find your seedtrace API key in your seedtrace dashboard under "Settings" > "Keys" or by following this link. Copy your API key into the respective field in the plugin settings and click save.
2. Select work mode
The work mode specifies how you want to embed the seedtrace widget into your product detail page. Currently there are two options: "After add to cart" will add the seedtrace widget automatically under the "Add to cart" button for every product that you connected to seedtrace data. "Shortcode only" will add the seedtrace widget only where you add the seedtrace shortcode (see below). Select your preferred work mode and hit save.
3. Connect your products
Since most data in seedtrace is product specific you must specify which of your products in Woocommerce belongs to a seedtrace product. You can select both in the respective dropdown and add as many items as you want.
Impact claims & Button type
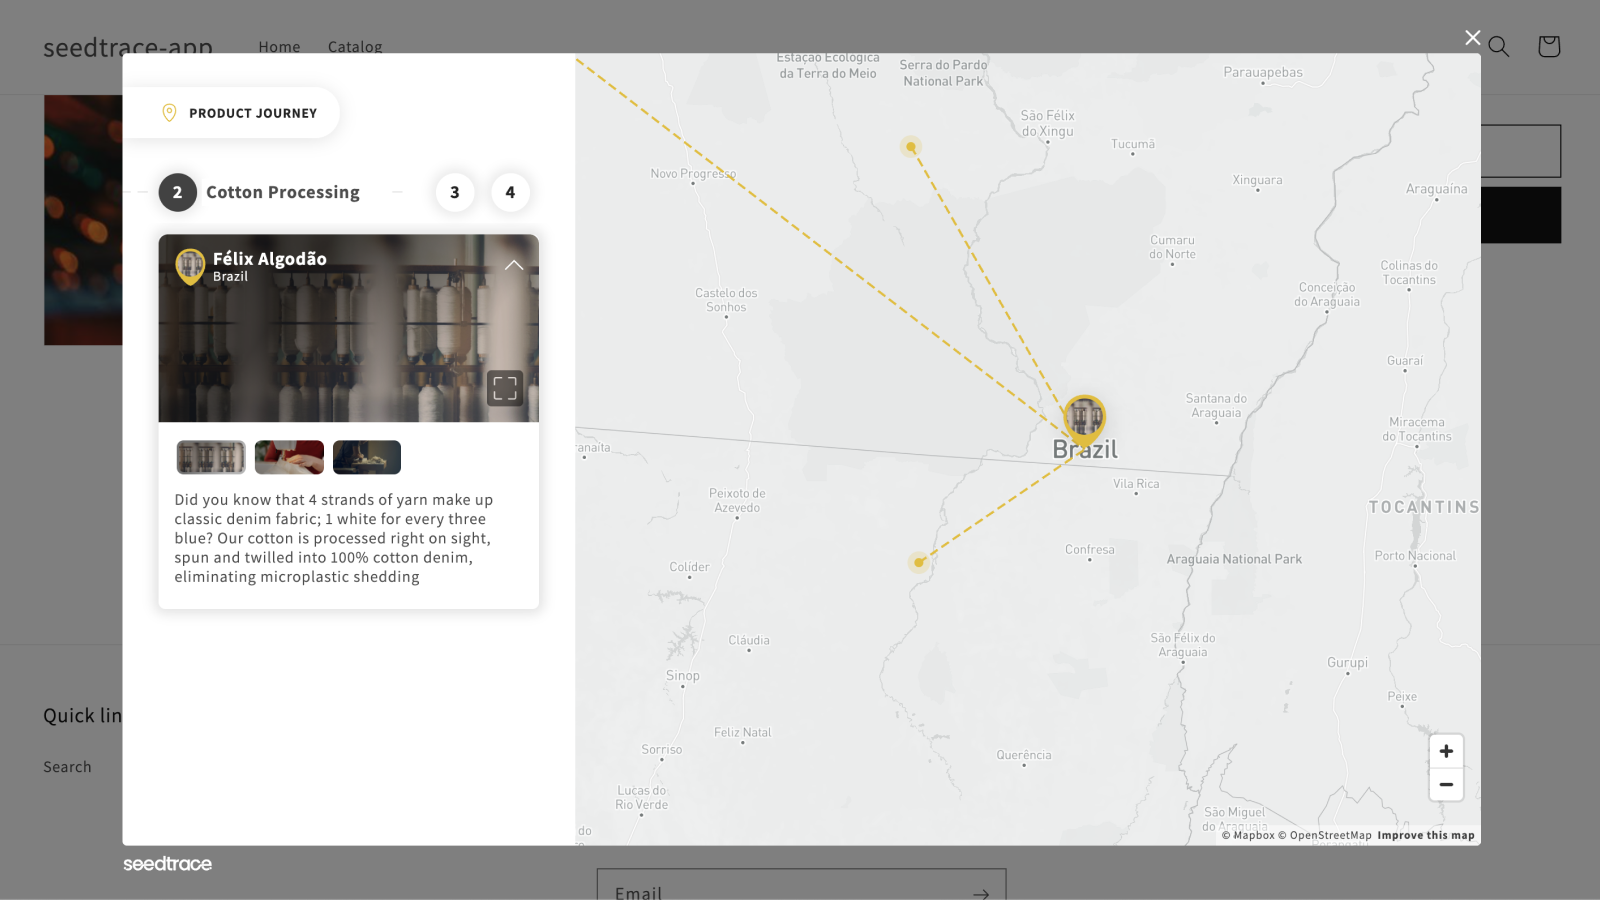
In the seedtrace Business app, go to 'Settings' page and select the tab 'Integrations' or click on this link. Here you can choose which button you want to show on your webshop, see the example next to it.
A recently added feature are the impact claims, they can now also be added on your product page, by enabling the 'Display impact claims' they will be visible above the product journey button
These settings can always be changed later and will be applied to your product page automatically.
Widget integration
If you would like to display the seedtrace widget after your add to cart button choose "After add to cart" as work mode you don't need to do anything else. If you would like to display the seedtrace widget at another place, you will need to add the shortcode manually. If you're unfamiliar with the concept of shortcodes we recommend you read this article first.
There are two ways to add the seedtrace shortcode to your product detail page:
1. Add shortcode in WP admin
You can add the shortcode [seedtrace] to any shortcode capable field like "Product Short Description". Hit update and your changes should be visible on your product detail page.
2. Add shortcode to template
If you have a lot of products that use the seedtrace widget it might make sense to add the shortcode to your PHP template. We only recommend this option if you're familiar with PHP code and Wordpress development. You will need to add the following line of code at the place that you want the seedtrace widget to appear:
do_shortcode("[seedtrace]")